emails bouncing back: Quick fixes to improve deliverability
December 06, 2025
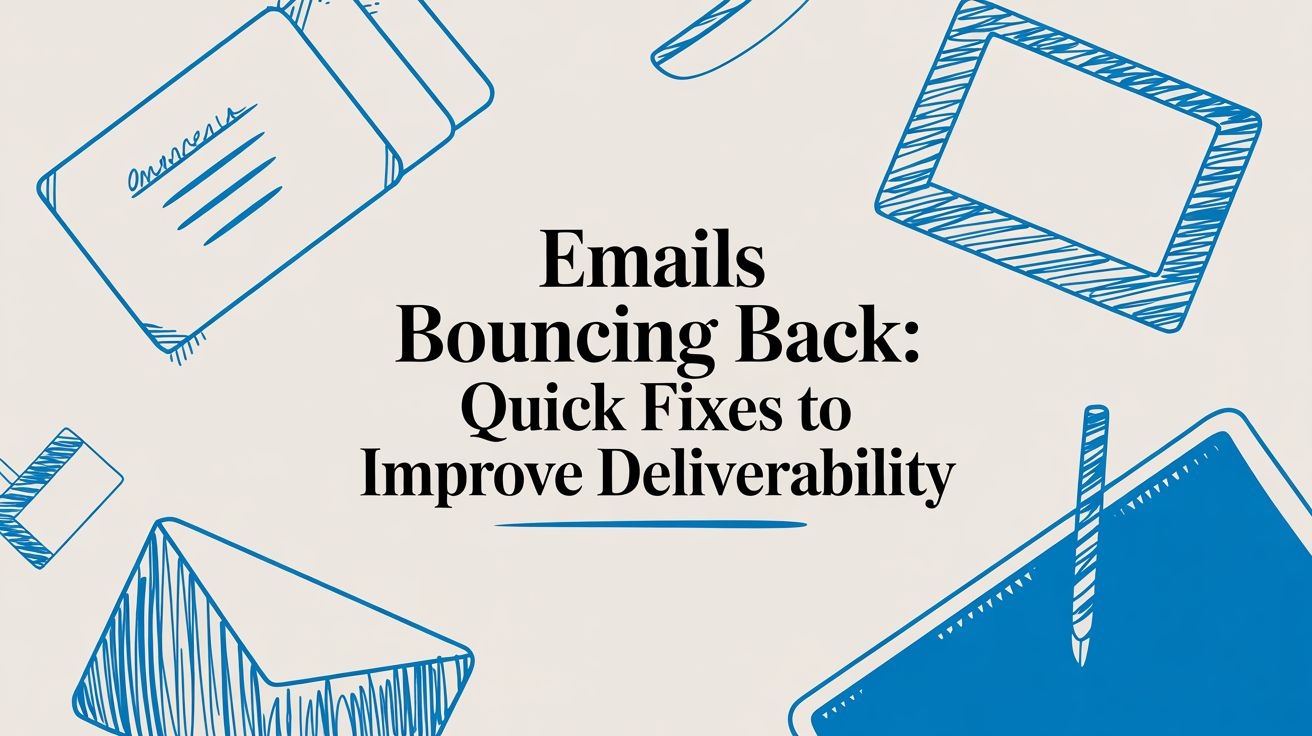
When you send an email and it comes straight back, it’s not just frustrating—it’s a red flag. The recipient's server has essentially refused your delivery, and this happens for one of two reasons. It's either a hard bounce, which signals a permanent dead end, or a soft bounce, a temporary hiccup. Knowing the difference is the first real step toward fixing the problem and protecting your email deliverability.
Breaking Down Email Bounces
That 'delivery failed' notification is more than just noise in your inbox; it’s a vital piece of feedback on the health of your email list and sending practices. When a message returns, you need to dig into why. The whole issue of emails bouncing back really boils down to two main types of failures.
Think of it like posting a letter. A hard bounce is like sending mail to a house that's been knocked down. The address is gone for good, and that letter is always coming back to you. A soft bounce, on the other hand, is more like the letterbox being stuffed full. You can't deliver it right now, but you could probably try again tomorrow.
Hard Bounces: Permanent Delivery Failures
A hard bounce is a full stop. It tells you there’s a permanent reason your email couldn’t be delivered. There's absolutely no point in resending it, because you'll just get the same result.
Ignoring hard bounces is a bad idea. Internet Service Providers (ISPs) pay close attention to them. If you keep sending emails that bounce back hard, your sender reputation takes a serious hit, making it far more likely that all your future emails will get routed straight to spam.
The usual culprits for a hard bounce are:
- Invalid Email Address: This could be a simple typo (
[email protected]instead ofgmail.com) or an address that was never valid to begin with. - Non-Existent Domain: The domain part of the address (
@company.com) is either fake or has expired. - Server Rejection: The recipient's email server has actively blocked delivery from your domain or IP address, which is a big red flag.
You absolutely must remove hard-bounced addresses from your mailing list immediately. Continuously trying to send to these dead ends signals poor list management to email providers, which can cause long-term damage to your sending authority. Our anti-spam policy at Astonish Email goes into more detail on why a clean list is non-negotiable.
Soft Bounces: Temporary Setbacks
Unlike its permanent cousin, a soft bounce is a temporary glitch. The email address is perfectly valid, but the receiving server has rejected it for a reason that could be resolved. Most email marketing platforms, including ours, will automatically try to resend a soft-bounced email a few times over the next day or so.
Common reasons for a soft bounce include:
- Mailbox Full: The recipient’s inbox has hit its storage limit and can't accept new messages.
- Server Temporarily Unavailable: Their email server might be offline for maintenance or simply overloaded with traffic.
- Email Size Too Large: Your message, especially with attachments, exceeds the size limit set by their server.
To make things clearer, here’s a quick breakdown of how these two bounce types stack up against each other.
Hard Bounce vs Soft Bounce At a Glance
| Characteristic | Hard Bounce | Soft Bounce |
|---|---|---|
| Nature of Failure | Permanent | Temporary |
| Can It Be Resent? | No, never | Yes, automatically retried |
| Common Causes | Invalid address, non-existent domain, server block | Full mailbox, server downtime, large email size |
| Impact on Reputation | High and immediate | Low, but high volume is a warning sign |
| Required Action | Remove from list immediately | Monitor; remove if it persists over time |
While a single soft bounce isn't a huge concern, if an address consistently soft-bounces across several campaigns, it might be an abandoned account. At that point, it’s best to treat it like a hard bounce and remove it from your list.
As a benchmark, in 2025, the average hard bounce rate in the UK B2B sector is around 0.5%—a testament to what good list hygiene can achieve. Keeping on top of these bounces is just part of the game.
How to Read Bounce Notifications Like a Pro
When an email bounces, that cryptic “delivery failed” message lands in your inbox looking like a wall of technical jargon. But hidden inside that confusing text are vital clues that tell you exactly why your message didn't make it. Learning to decipher these notifications is the first step in turning a frustrating bounce into a powerful diagnostic tool.
Instead of getting overwhelmed, you just need to zero in on the one or two lines that tell the real story. These messages, officially known as Non-Delivery Reports (NDRs), contain specific codes and plain-English phrases that point you straight to the cause of the problem.
Finding the Clues in an NDR
An NDR might look intimidating at first glance, but you’re really only hunting for a couple of key pieces of information. The most important part is the reason for the failure, which is almost always paired with a numerical code.
For instance, a classic hard bounce notification might contain a line like this:
550 5.1.1 User unknown
This isn't just random tech-speak. The 550 is a permanent failure code sent back by the recipient's server, and User unknown is the human-readable explanation. It’s telling you, quite simply, that the email address doesn't exist. There’s no ambiguity here – that address is a dead end.
Here are a few other common codes you’ll run into and what they mean in practice:
552 Mailbox full: This is a soft bounce. The address is valid, but the recipient's inbox has no room. It’s worth trying again later.421 Service not available: A temporary hiccup with their server. Your email provider will almost certainly try resending automatically.554 Message rejected for policy reasons: This one’s a bit different. The recipient’s server blocked your email, likely because something in your content triggered a spam filter.
By focusing on the SMTP code and the short explanation, you can instantly tell if the problem is permanent (a 5xx code) or temporary (a 4xx code). This distinction is critical because it tells you what to do next: either remove the address for good or just wait it out.
From Single Bounces to Spotting Trends
While digging into individual bounce notifications is great for fixing one-off issues, the real gold is in the bigger picture. Your email service provider’s (ESP) dashboard is where you can spot patterns that signal a more serious, underlying problem.
Your ESP's analytics tools gather all this bounce data and present it in easy-to-digest reports. Instead of getting bogged down in individual NDRs, you can see your campaign's overall bounce rate at a glance, neatly broken down by type.
Here’s a practical example of how to use these reports:
- Log in to your Astonish Email dashboard after sending a campaign.
- Navigate to the Reports section and select your most recent campaign.
- Look at the Bounce Rate summary. If it's higher than usual, click to view the details.
- Sort the bounced contacts by their domain (e.g.,
@bigcorp.co.uk,@gmail.com). - If you notice nearly all the bounces are from a single company, like
@bigcorp.co.uk, that’s a massive clue that their mail server might have temporarily blocked your sending IP, perhaps because they just rolled out a new security filter.
This high-level view is what turns confusing data into actionable insight. It helps you move beyond fixing one bad address and start troubleshooting the systemic issues that could be quietly tanking your deliverability.
Your Practical Diagnostic Checklist for Bouncing Emails
When emails start bouncing, you need to put on your detective hat. The best approach is a systematic one, working from the most likely culprits to the more technical gremlins. This way, you can pinpoint the exact cause without getting lost in the weeds and get your deliverability back on track.
Let's start with the most common offender and the easiest fix: the recipient's email address. Before you even think about server settings or authentication records, take a close look at the addresses that are bouncing. It’s amazing how often a simple typo is the root cause of a hard bounce. It's a quick win, so let's rule it out first.
First Things First: Are the Email Addresses Correct?
Your first port of call should always be a quick validation check. Plenty of free online tools can help with this. Just copy and paste a few of the bouncing addresses into a verifier to see what it says.
Here's a step-by-step example of how to check:
- Identify a bouncing address from your campaign report, for example,
[email protected]which returned a "User unknown" error. - Go to an online email verification tool. There are many free options available with a quick search.
- Enter the email address into the tool and run the check.
- Review the results. The tool might confirm the address doesn't exist. Now, check your original list and notice a typo—it should have been
[email protected]. - Correct the address in your list. You've just fixed a hard bounce for all future campaigns.
This simple step can clear up a surprising number of your hard bounces, especially if you’re seeing isolated failures rather than a massive, campaign-wide problem.
This flow chart can help you decide where to focus your efforts, depending on whether you're dealing with a single bounce or a flood of them.
The key is to figure out if you have a few bad addresses or a much bigger, more systemic issue that’s sinking your entire campaign.
Next Up: Take a Hard Look at Your Content and Subject Line
If the addresses check out, it's time to scrutinise what you’re actually sending. Recipient servers are on high alert for anything that even vaguely smells of spam. Overly aggressive sales language, certain keywords, or even just too much punctuation can get your message blocked before it ever reaches the inbox.
Here’s a practical mini-audit you can perform on your email:
- Check the Subject Line: Does it contain spam trigger words like "Free," "Win," "Urgent," or "Guaranteed"? Is it in ALL CAPS or filled with symbols like
$$$or!!!?- Bad Example:
$$$ URGENT ACTION REQUIRED! Open NOW to claim your FREE prize! $$$ - Good Example:
A quick question about your recent order
- Bad Example:
- Review the Body Content:
- Link Check: Are there too many links? A good rule of thumb is to use links only where necessary. An email stuffed with dozens of links looks suspicious.
- Image-to-Text Ratio: Avoid sending emails that are just one large image. Spam filters can't read images and often block them. Ensure there is a healthy balance of text and images.
- Code Check: If you're using custom HTML, ensure it's clean and not broken. Use a validation tool to check your code before sending.
Finally: Check Your Sender Authentication Records
Okay, so your addresses are valid and your content is clean. Now we need to look at the technical bedrock of your email setup: SPF, DKIM, and DMARC. Think of these as your email passport—they prove to receiving servers that you are who you say you are.
Here’s a simple, step-by-step guide to check your records:
- Go to an online lookup tool like MXToolbox.
- Select the appropriate lookup for each record (e.g., "SPF Record Lookup," "DKIM Record Lookup").
- Enter your domain name (e.g.,
yourcompany.com) into the search bar. For DKIM, you will also need a "selector," which your email provider gives you. - Run the check. The tool will return a report. Look for a green "Pass" or "Valid" status. If you see a red "Fail" or "Missing" error, you've found a major reason why your emails are bouncing back, as servers simply can't verify your identity.
- If a record is missing or incorrect, contact your domain registrar or IT department with the information from the tool to get it fixed.
Keeping a close eye on your bounce rate is non-negotiable. For context, UK email marketing bounce rates in 2024 have been sitting around 2.3%, just a fraction higher than the ideal target of under 2%. This isn't just a vanity metric; a bounce rate that creeps up past 5% is a serious warning sign of deliverability problems that could tarnish your sender reputation. If you want to dig deeper, you can read the full research about UK email marketing benchmarks.
Proven Strategies to Get Your Bounce Rate Down
Once you’ve figured out why your emails are bouncing, it’s time to shift from detective work to taking action. Dealing with bounces isn’t just about putting out fires; it’s about building smart, sustainable habits that protect your sender reputation and make sure your messages actually get delivered.
The first move is simple and non-negotiable: clean your list. Pull up your last campaign report and permanently delete every single email address that triggered a hard bounce. There’s absolutely zero upside to keeping them. They're dead ends that damage your deliverability every time you hit send.
Re-Engage Your Quiet Subscribers (or Let Them Go)
With the hard bounces gone, turn your attention to the subscribers who've gone silent. Someone who hasn’t opened one of your emails in the last 90 days is a ticking time bomb for a future bounce. They might have ditched that inbox or just moved on, but sending to them drags down your engagement rates.
Here’s a step-by-step guide to running a re-engagement campaign:
- Create a segment: Go into your email platform and build a new list segment. Set the criteria to include subscribers who "have not opened" AND "have not clicked" any email in the past 90 days.
- Craft a "last chance" email: Write a simple, direct message.
- Subject Line: "Is this goodbye?" or "Do you still want to hear from us?"
- Body: Briefly remind them who you are and ask if they want to stay subscribed. Include a single, clear call-to-action button.
- Call-to-Action Button: "Yes, keep me on the list!"
- Send the campaign exclusively to this new segment.
- Wait and analyze: Give it about a week. After that, anyone in the segment who did not open or click the email should be removed from your main list. It might feel like a big cut, but what’s left is a smaller list that's far more engaged and healthier for your sender score.
Build Proactive Habits for Better Deliverability
Fixing today’s bounces is good, but preventing tomorrow’s is even better. To keep that bounce rate low for the long haul, you need to stop bad email addresses from getting on your list in the first place.
Here’s how to implement a double opt-in process:
- Find the setting: In your email marketing platform, navigate to your sign-up form settings or list settings.
- Enable double opt-in: Look for a checkbox or toggle switch labeled "Enable Double Opt-In" or "Send Confirmation Email" and turn it on.
- Customise the confirmation email: Edit the default email to match your brand's voice. Make sure the instructions are crystal clear, telling the new subscriber they must click the link inside to confirm their subscription.
- Save your changes. Now, every new subscriber will automatically receive this confirmation email, guaranteeing every address on your list is valid and engaged from day one.
Another great habit is to schedule regular list validation. Think of it like a routine check-up. Every six months, run your entire email list through a validation service. This will help you catch addresses that have become inactive or invalid over time before they turn into hard bounces on your next campaign.
For a deeper dive into building a rock-solid sending reputation, it’s well worth exploring these email deliverability best practices.
By making these cleanup and prevention tactics a regular part of your workflow, you’ll turn list management from a reactive chore into a real strategic advantage. You’ll be confident your emails are consistently landing right where you want them: in the inbox.
Your email platform should be your greatest ally in the fight against bouncing emails, not just a tool that reports the bad news. Shifting from tedious manual clean-ups to smart, automated processes is the real secret to maintaining a healthy list with far less effort. Let’s get practical and look at how you can use Astonish Email’s built-in features to get ahead of deliverability issues and keep your sender reputation pristine.

The system is designed to handle the most critical issue—hard bounces—without you lifting a finger. The moment a hard bounce is detected, Astonish Email automatically suppresses that address, making sure you never send to it again. This immediate, hands-off action is crucial for protecting your sender score from taking a hit.
Find Your Deliverability Reports
To get a clear picture of your campaign’s health, you first need to know where to look. Your Astonish Email dashboard provides detailed, easy-to-read reports for every single campaign you send.
Here’s a step-by-step guide to finding and using these reports:
- Log in to your account and navigate to the Campaigns section from the main dashboard.
- Select the campaign you want to analyse by clicking on its name.
- Once the campaign view loads, click on the Reporting tab at the top.
- You will now see a clear breakdown of your delivery statistics, including the exact number and percentage of emails that hard or soft bounced.
- Click on the number next to "Hard Bounces" to view a list of the specific contacts that failed, giving you invaluable data for your list hygiene efforts.
The most powerful deliverability strategies are the ones you don't have to think about. By setting up automated rules, you create a self-cleaning system that works for you in the background, preventing future bounces before they even happen.
Segment Inactive Subscribers Automatically
Continuously sending emails to unengaged subscribers is a fast track to list decay and, eventually, bounces. Astonish Email helps you solve this problem with engagement scoring, a feature that automatically keeps an eye on subscriber activity. You can then use this data to create dynamic segments that do the hard work for you.
Here's a practical guide to setting this up:
- Go to the Subscribers or Audience section in your dashboard.
- Choose the option to Create a New Segment.
- Set the conditions for the segment. For example:
Engagement Score is less than 2 starsORDate Subscribed is before [date 90 days ago] AND Last Opened was more than 90 days ago. - Name your segment "Cold Subscribers" and save it.
- Now, when you create a new campaign, you can choose to exclude the "Cold Subscribers" segment from your send list. This automatically keeps your campaigns focused on your most active readers.
This automated approach keeps your primary lists full of active, interested readers, which is exactly what mailbox providers like Gmail and Outlook want to see. By exploring all the automation tools at your disposal, you can build a smarter, more resilient email strategy. You can learn more about the complete suite of tools in the Astonish Email features overview.
Common Questions About Bouncing Emails
Getting to the bottom of email deliverability can feel like a bit of a maze. To help you find your way, I’ve put together answers to some of the questions we hear all the time from business owners trying to figure out why their emails aren't landing.
What Is an Acceptable Email Bounce Rate?
If you're seeing a bounce rate under 2%, you're in great shape. That's the gold standard and a clear sign that you’re managing a healthy email list and following good sending practices.
However, once your rate starts climbing and consistently hits over 5%, alarm bells should be ringing. A high bounce rate is a major red flag for mailbox providers like Gmail and Outlook. It suggests a problem with your list quality or content, and if you ignore it, you risk serious damage to your sender reputation, which could get future emails blocked altogether.
Can Sending Too Many Emails at Once Cause Bounces?
Yes, it absolutely can. Blasting out a massive email campaign from a new or "cold" IP address or domain is one of the fastest ways to trigger spam filters. Receiving servers see that sudden spike in activity as suspicious, and they'll often respond by bouncing your emails.
This is why "warming up" your sending infrastructure is so crucial. Here's a practical example of a warm-up schedule:
- Day 1: Send to your 500 most engaged subscribers.
- Day 2: Send to 1,000 engaged subscribers.
- Day 3: Send to 2,500 subscribers.
- Week 2: Continue doubling your send volume every few days until you reach your full list size.
This gradual increase shows providers you're a legitimate sender, not a spammer trying a smash-and-grab.
A sudden, high-volume send is one of the quickest ways to get your domain or IP address flagged. A slow and steady warm-up process is non-negotiable for anyone serious about email marketing.
How Often Should I Clean My Email List?
Honestly, list cleaning should be an ongoing habit, not a rare event. You should be set up to remove any hard bounces automatically and immediately after every single campaign. There's no reason to keep a bad address on your list for even a second longer than necessary.
For deeper hygiene, I'd recommend running a full validation check and perhaps a re-engagement campaign at least every 6 to 12 months. If you're sending a lot of emails, doing this quarterly is an even smarter move to keep your deliverability sharp. Staying on top of list decay is the key to preventing bounces before they happen. If you're facing a specific challenge with your list, feel free to get in touch with our support team for some personalised advice.
Ready to stop worrying about bounces and start growing your business? With Astonish Email, you get powerful, automated tools that manage your list hygiene for you. Start your free plan today and see how easy it is to keep your deliverability high and your emails landing in the inbox.